Dometic Burner | Igniter | Burner Orifice | Flue Tube Cleaning

How to test and clean the Dometic burner orifice (gas jet), check the burner flame & gas igniter, clean and check the flue tube, baffle (diffuser), and flue cap.
Although this video is for another fridge, this video teaches the principles that apply to Dometic RV refrigerators. This video teaches how to: turn off the gas to the burner to test the igniter, shows the flue tube, baffle (diffuser), why there should be a flue baffle, how to remove the burner orifice (or gas jet) for cleaning.

Please read on to solve your Dometic burner problems:

Dometic Gas Valve Assembly
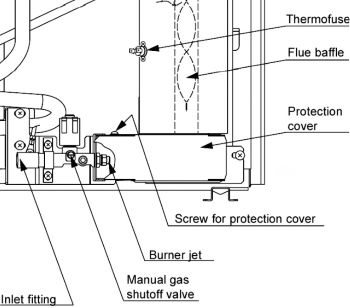
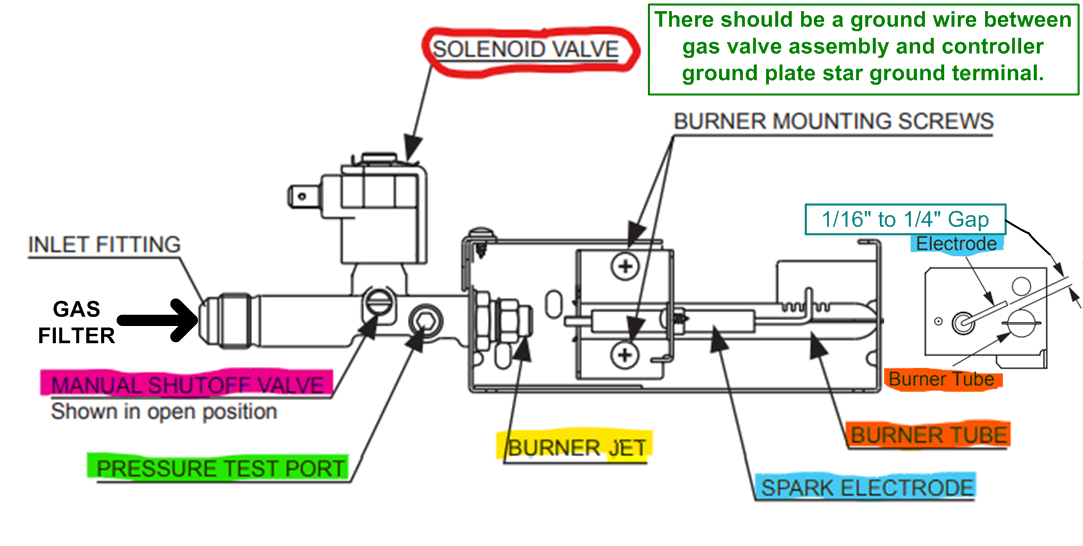
GAS VALVE BURNER DRAWING

This page is going to deal with the components found to the right of the gas valve, this is the Dometic burner assembly. For the components to the left use menu above for testing the gas valve, filter, and pressure test port.

The burner jet (orifice) can plug with oils and other contaminates.

At least one mounting screw should have a ground wire that grounds the burner to the controller.

The spark electrode gap adjustment is described below.

The burner tube is what the igniter spark should jump to from the spark electrode.

Whenever working on the LP gas lines, perform a bubble test on the gas fittings afterward to make sure there are no leaks in the system. Use extreme caution; always know how to turn off the gas at the source in case of an accident.
----------------------------------------------------------------------------------

BURNER FLAME & IGNITER
Dometic Gas Igniter

RV Fridge Flame Adjustment -- Arc Gap for Easy Ignition

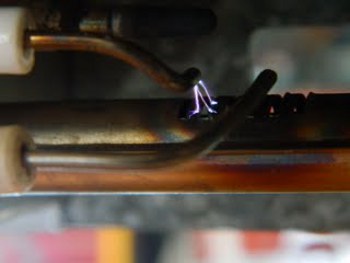
Referencing the photo to the left, a gas igniter arc is shown, the ark is jumping from an electrode to the LP Gas burner. Please note, your burner will have only one electrode, this photo shows two electrodes, we used two electrodes for experimentation and development of the Fridge Defend by ARP.

Typically the propane flame will ignite within two strikes of the igniter. Open the burner housing and have someone turn on the LP gas while viewing the igniter arc. If the flame does not ignite immediately, check the following:
IGNITER ADJUSTMENT
Dometic Electrode Adjustment


Click here to see our video companion to this page on LP pressure adjustment and filter cleaning.

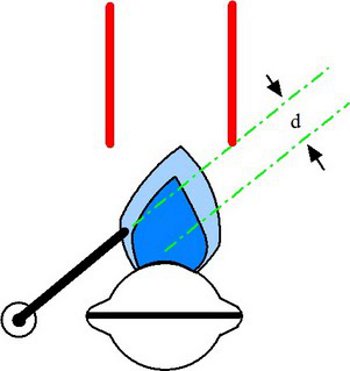
This drawing shows the side view of the burner tube and the spark electrode. Start by making sure that the wire from the Dometic controller to the spark electrode is not arcing to the fridge frame or damaged. Next, check the spark gap ‘d’, this distance should be from 3/16 to 1/4 inch. We prefer 1/4 inch because a wider arc gap makes less electrical noise. Click here for article on cooling unit replacement and working on the burner assembly .
Dometic Flame Adjustment

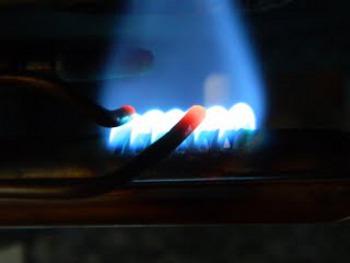
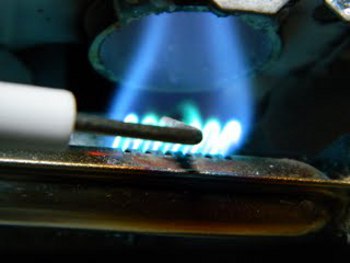
When the igniter is adjusted properly, and the propane flame is lit, the very tip of the igniter electrode should glow red. This photo shows a properly adjusted electrode and the blue flame one should see when the burner is ignited.
It is a miss understanding that one can just look at the flame and know if it is giving the proper amount of heat. This is not true, only by measuring the boiler temperature, as the Fridge Defend does, can one determine if the boiler is getting enough heat.

Make sure the propane regulator is set at 11 inches of water column, and the LP filter is not plugged.

FLAME ADJUSTMENT
RV Refrigerator Maintenance LP Gas Flame

Referencing the photo to the left, the flame alignment should be in the center of flue.

If the flame is not centered in the flue tube, the burner assembly can be adjusted so that the flame is centered just as seen in this photo. That is, the flame should not touch the flue tube; note the gap between the blue flame and the edge of the flue tube.

A wonderful RV supplier provides the Factory Service and Owners manuals: Bryant RV Services.

ORIFICE CLEANING & INSPECTION
Dometic Gas Jet Plugged
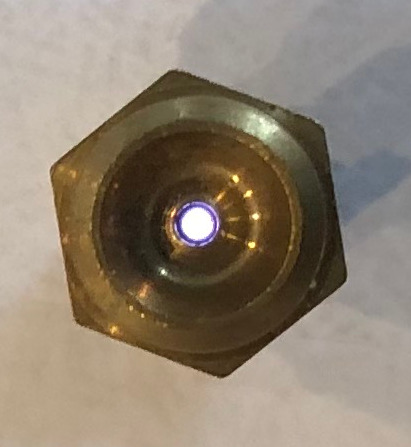
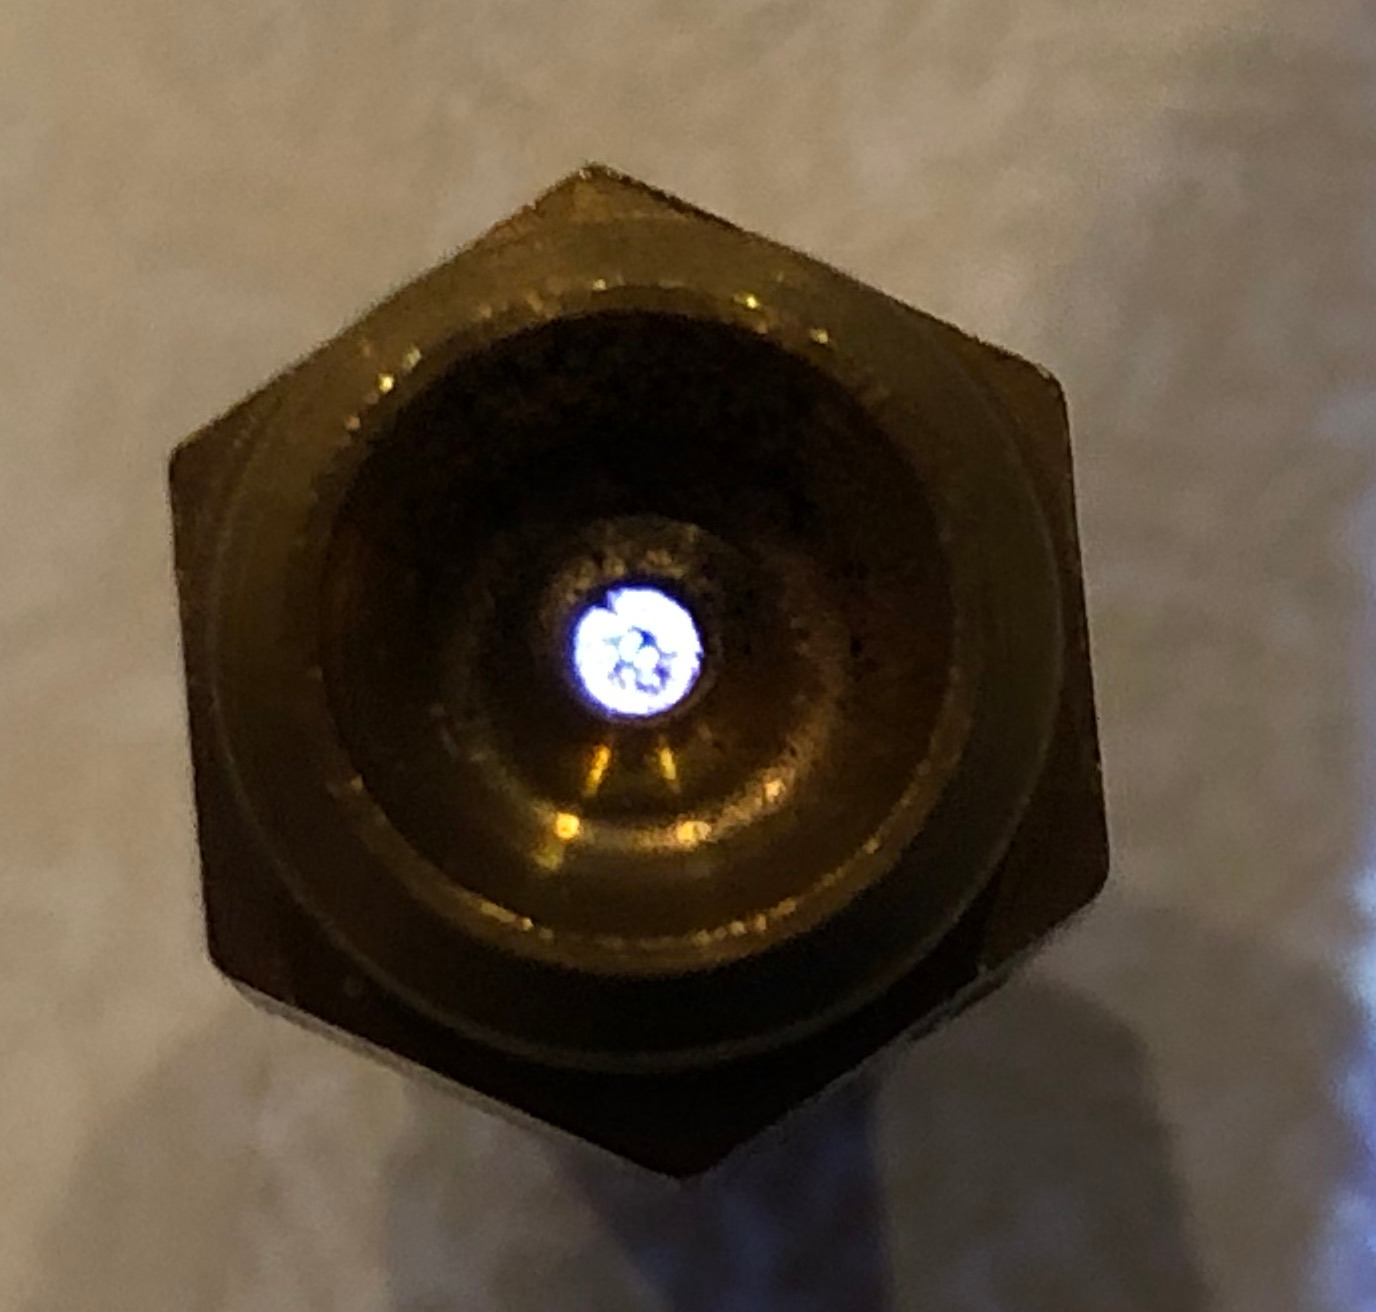
Use two wrenches to remove the burner jet (orifice) for cleaning. Hold the burner jet up to the light and adjust so you can see through the orifice. This photo shows a dirty burner orifice; note that contamination is plugging the hole. Never use a tool to try and clear the orifice. Also, do not use too high pressure air to blow through the orifice. As with the filter, soak the orifice in 90% isopropyl alcohol to clean. Gently blow out the orifice to remove contamination after soaking in alcohol.

Dometic Gas Jet Clean
This photo is of the orifice above after cleaning, note the dark ring around the edge of the orifice, this can be oil contamination. Although this particular burner jet worked fine once installed, sometimes the orifice may need to be replaced if all the contamination cannot be removed.

FLUE TUBE CLEANING & INSPECTION
Dometic Plugged Flue Tube


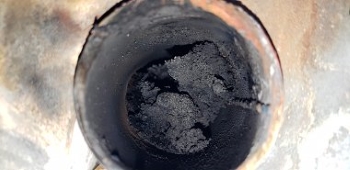
This is a photo looking into the flue tube of a Dometic DM2852. What is seen is the flue baffle (diffuser), where insects (mud or dirt dabbers) built a nest within the flue tube on the baffle. The following procedures explain how to check and clean the flue:

Dometic Flue Baffel
Starting from the burner assembly and working toward the top of the flu tube we will describe the parts within the flue tube.

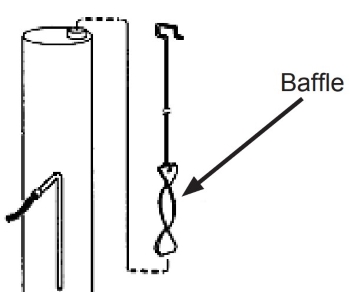
This image is a cut away showing the Flue Baffle inside the flue tube. This baffle is necessary for the propane function of the fridge. Sometimes when cooling units are installed, the Flue Baffle is not reinstalled, and the fridge will not operate on propane as a result.

To clean and inspect the Flue Tube, the Flue Baffle must be removed from the top of the flue tube. Start by removal of the burner protection cover.

To clean and inspect the Flue Tube, the Flue Baffle must be removed from the top of the flue tube. Start by removal of the burner protection cover to expose the burner assembly. Be carful when performing this procedure not to bend the igniter. It is best to perform this operation with two people, one at the top to clean, one at the bottom to make sure the cleaning rod is not pushed too far down and damage the igniter. Also, the person at the bottom can use a vacuums to suck out the debris from cleaning so it does not get into the burner.

Dometic Baffel Assembly
This image shows the Baffle Assembly. The baffle assembly is removed from the top of the flue tube. Some RVs, the top vent can be remove to access the top of the flue tube. But, a lot of newer RVs have been made in a manner that requires the fridge to be removed for this service.

At the top of the flue tube is a flue cap. Again, many newer RVs they omit the flue cap, if you have issues with the flame staying lit wile driving, by putting a flue cap on can solve this issue. Returning to the flue cap, the flue cap must be removed to access the rod that is used to remove the flue baffle.

Once the flue baffle is removed, inspect it for damage, replace if the baffle appears to be damaged. Now one can use a 12 gauge shotgun brass brush to clean the flue tube. Be sure not to shove the brush into the igniter and bend/break the igniter. Also, be sure to reinstall the flue baffle when done.

Questions?

If you have any questions about information on this page, please use the Contact Us button below.