Our Amish cooling unit page shows how to install either a Dometic or Norcold cooling unit including installation of the Fridge Defend by ARP.
We hope you will find the following helpful by showing how to locate the Fridge Defend temperature sensor during the replacement of a failed Dometic RM3862 fridge. Although this page shows a Dometic install, the principles are the same for a Norcold cooling unit. We would like to give a special acknowledgment to Dave Force at RV Cooling Warehouse. Dave was kind enough to supply us with a new Amish cooling unit to install and evaluate with the Fridge Defend controller!
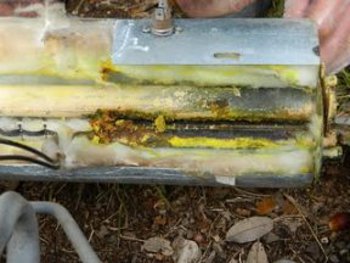
The Dometic RM3862 cooling unit in this picture failed after 17 years of service. The fluids leaked out of a crack in the boiler area, this is the type of failure that Fridge Defend protects against. The owner decided to replace it with an Ditch Aire (Amish) cooling unit.
After following the instructions provided with the cooling unit for the removal of the refrigerator, the old cooling unit itself was removed. Before final installation of the new cooling unit, we suggest a dry-run by placing the new unit in the fridge with the refrigerator controls already mounted and installed. This step will insure everything fits properly before moving forward.
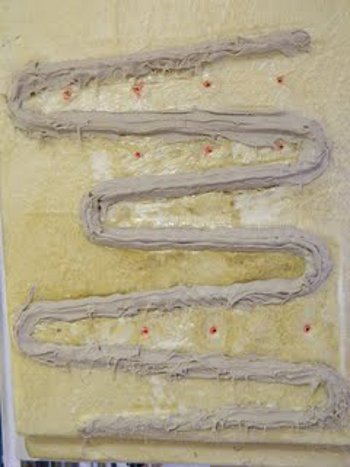
This figure shows the thermal mastic applied to the evaporator tubes. Use all of the mastic - this increases the contact area between the round evaporator tubes and the flat cooling plate that mates to the evaporator. Also note that we put the red paint around each of the mounting holes to make it easier to see the holes when re-installing the screws.
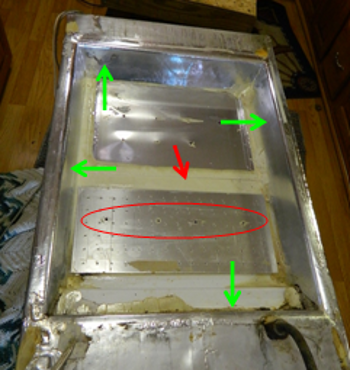
This photo shows the evaporator cavity in the refrigerator compartment. It is important to note that this cavity needs to be sealed both from the inside of the refrigerator and the outside. The seal is necessary due to water from condensation collecting on the evaporator tubing and causing rust pitting of the steel tubes.
First we used standard silicone sealant to seal around the refrigerator cooling fin plate to the refrigerator shell. This will stop water from entering from the refrigerator side of the evaporator. In addition, the red oval is around some of the mounting screws. Upon installation of the mounting screws, place silicone on the threads and heads of the screws to properly seal them.
Spray foam came with the kit. A bead of foam about 1/2" thick was applied to the tapered mating surface - about 1" from the top, where the green arrows point.
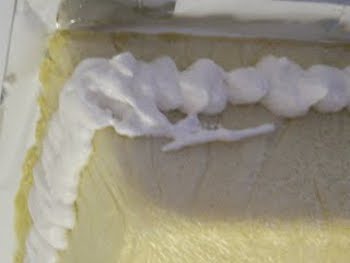
This photo shows the Amish cooling unit evaporator with a bead of spray foam - which will seal with the mating side of the above photo.
It takes two people to align and then place the cooling unit into the cavity.
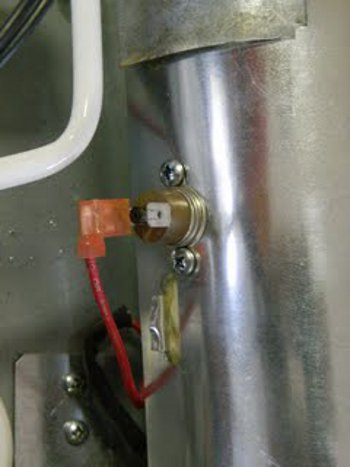
After installing the cooling unit, per the instructions, we recommend installing the manufacturers thermal switch on the boiler housing.
Although the factory recall is not required on after market cooling units, we recommend reinstalling them, we never recommend removal of any factory devices.
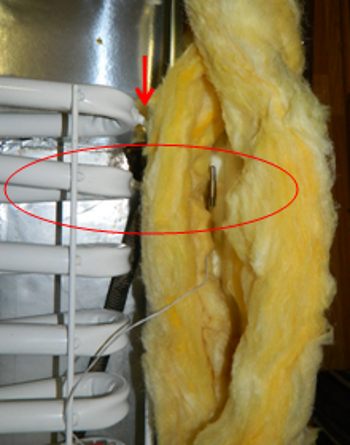
Please note that the following location for the temperature sensor was recommended for a slightly faster response to an overheat situation so that the ARP Control can respond rapidly. The downside is that one cannot get to the temperature sensor once the fridge is installed. Thus, the sensor should be mounted by just opening the heater access door to avoid this situation. As long as the temperature sensor is 1.0" above the electric heaters you will be good to go.
The Boiler Housing is then opened to install your new ARP Control boiler temperature sensor. Because the cooling unit is out of the RV, it is easy to install the Temperature Probe adjacent to the second absorber coil from the top (red oval). This temperature sensor location provides excellent results, but can be difficult to install here when the refrigerator is already installed in the RV. Further, this location can not be accessed once the fridge is reinstalled.
The red arrow points to the location that the weak solution enters the absorber coil. The ARP Temperature Probe must always be below this height on the Boiler Process Tube.
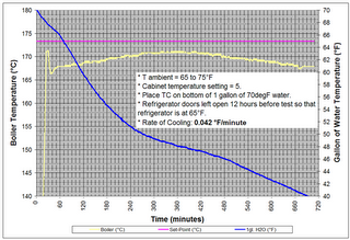
The graph shows the results from a test that was conducted after running the Amish unit for 2 days. We are very impressed with the results. The Boiler runs at a cool steady-state temperature. The performance is excellent! The owner of this rebuilt unit has never seen his freezer down to -7 degrees!! The Amish unit is functioning incredibly well!
We hope this description of an Amish Install was helpful.
Please click this link to see a continuation of this cooling unit story.